If you want to turn more of your website visitors into subscribers to your Mailchimp list. You will want to display a subscription form in your website. kenta theme makes it easy to implement such a feature.
Some of our starter sites are already included this feature, you just need to import them with one click, then everything will be fine.
Here we will demonstrate how to integrate it manually.
Install Mailchimp Plugin
First of all, you need a Mailchimp integration plugin, and if you don’t know which one to choose, then we recommend you to use MC4WP: Mailchimp for WordPress plugin which is being actively used on nearly 2 million WordPress sites.
The MC4WP plugin can be downloaded and installed for free from the WordPress dashboard.
Connect To Mailchimp Account
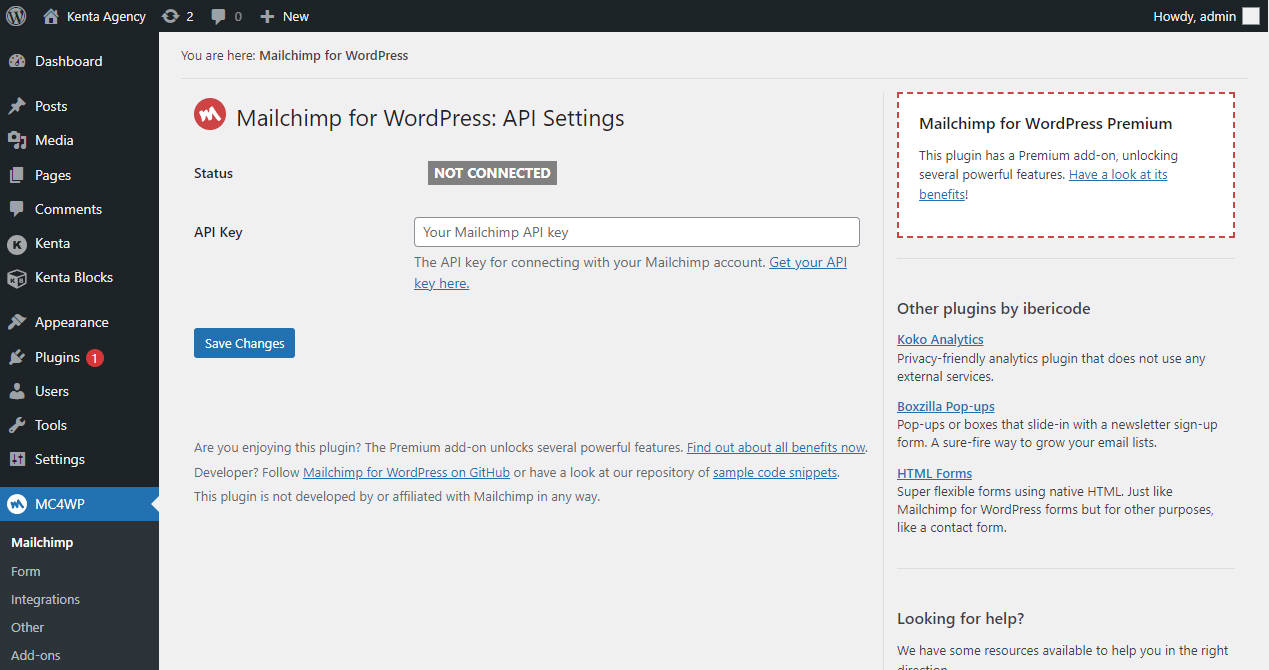
Before you can use the plugin you need to connect to your Mailchimp plugin from MC4WP menu.

You can get Mailchimp API key here: https://admin.mailchimp.com/account/api
Create New Form
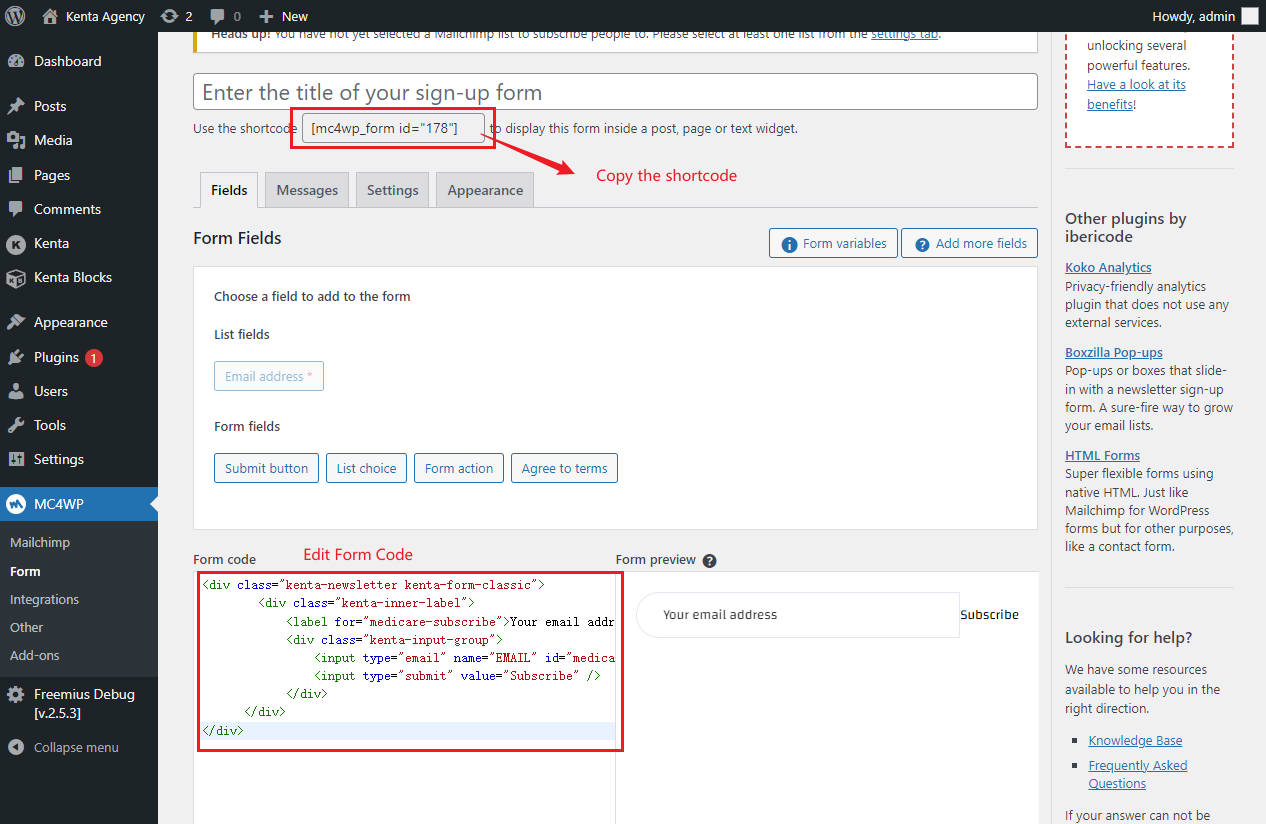
Once everything is ready, you need to create a form to collect users’ mailboxes and add them to the Mailchimp list.

Here is the sample form template code.
<div class="kenta-newsletter kenta-form-classic">
        <div class="kenta-inner-label">
            <label for="mailchimp-subscribe">Your email address</label>
            <div class="kenta-input-group">
                <input type="email" name="EMAIL" id="mailchimp-subscribe" required />
                <input type="submit" value="Subscribe" />
            </div>
	  </div>
</div>
Note that here we have included some of the Kenta theme’s built-in css classes. e.g. kenta-newsletter, kenta-form-classic, kenta-inner-label and kenta-input-group.
If you add Shortcode to your page, it will appear on the front end like this.

For more on the use of Kenta theme’s built-in form css classes, please see here.
One of the kenta-newsletter classes is designed for Mailchimp, without it, your form will look like this:

